Oracle Cloud EPM includes an approval process that can be used to control data submission, review, and finalization. Administrators can ensure that users abide by the budget process in a timely and organized fashion by using Planning Unit Hierarchies and Task lists. Approval units form the base for the approval workflow process in Oracle EPM Cloud applications such as PBCS (Planning & Budgeting Cloud Service).
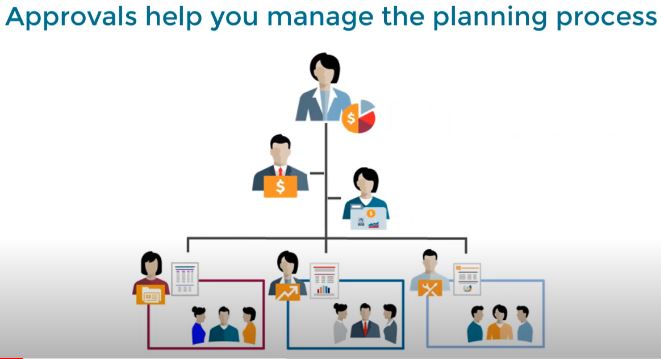
What is an Approval Unit?
An approval unit is basic for preparing, annotating, reviewing, and approving plan data. They are combinations of scenario, version, and entity or part of an entity. You can have one scenario/version combination per approval unit. Scenarios and versions are the basis of the review cycle. Approval units submit planning data for a scenario and version. For example, an approval unit might consist of a version (Best Case), a scenario (Actual), and an entity (New York). Approval units can also include secondary dimensions within any entity, refining the granularity of an approval unit.
Approval Process
The approval unit moves from one reviewer to another until the budget process is complete. The review process follows the promotional path you set up when you select the owner and reviewers for an approval unit unless an event triggers a change in the promotional path. Events that affect the promotional path include:
- Exceeding or not reaching expense boundaries for budget items such as salaries, new hires, or capital equipment
- When the current owner returns the budget to the previous owner for additional information
- When the current owner requests help from an authorized user who isn’t necessarily on the promotional path.
The selected approval template determines the first user to review the data. The first user completes the assigned tasks, then promotes (Bottom-Up template) or submits (Distribute template) the budget, which alerts the next owner that the budget requires their attention. Other users may also be notified whenever the budget passes from one user to another.
Each reviewer must validate the approval unit before sending the budget to the next reviewer. The validation runs all data validation rules defined for the approval unit with which the reviewer works and reports any data errors or changes in the promotional path.
Data Validation Rules
Service Administrators can build data validation rules that are checked when conditions are met in forms to implement business policies and practices. Rules can generate validation messages, enforce limits on submitted approval unit data, and designate a specific reviewer or owner to review data that meets some condition.
For example:
- Conditionalizing the approval unit promotional path (Expense should always be less than a particular value).
- Preventing the promotion of approval units that include invalid data.
You need to understand how these rules are evaluated and applied when designing rules that affect the promotional path of the approval unit for information about designing data validation rules and expected outcomes.
Let’s look at the high-level approval workflow creation process!
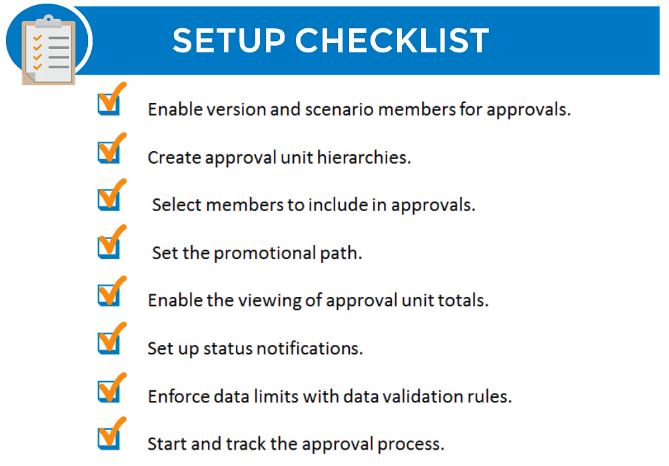
Step 1: Select the Approval unit from Navigator → workflow. You can create new approval units from here. Click on the “add icon” to create a new approval unit.
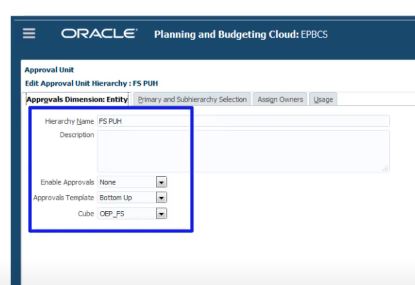
Step 2: Enter the approval unit name, description, and other required details. Select the required cube. Select the primary and sub-hierarchy selection tab.
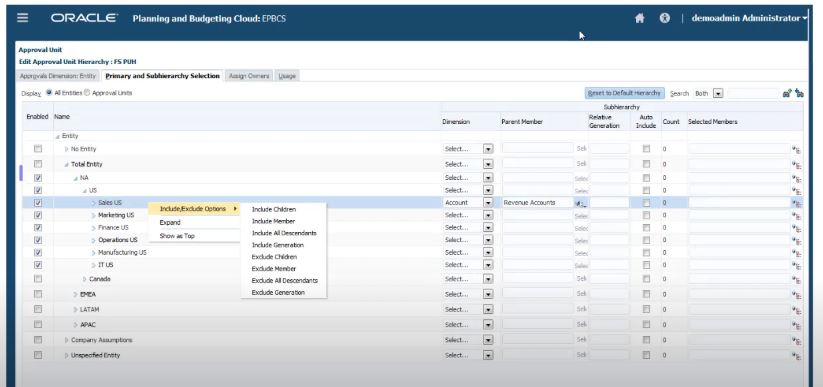
Step 3: Select the entity for which the approval unit needs to be created and the secondary dimension to include in the process.
Step 4: Select a parent for the secondary dimension and relative members. Then open the assign owners tab.
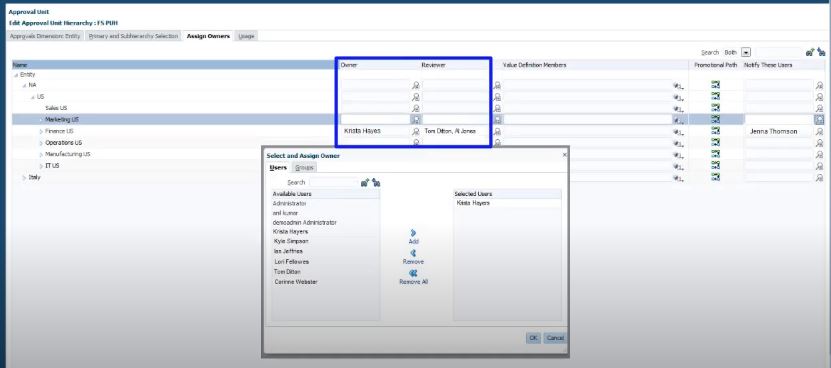
Step 5: Assign approval unit owner. Assign approval unit reviewer.
Step 6: Click on the icon under the promotional path tab to see users involved in the process. Then click on the save button.
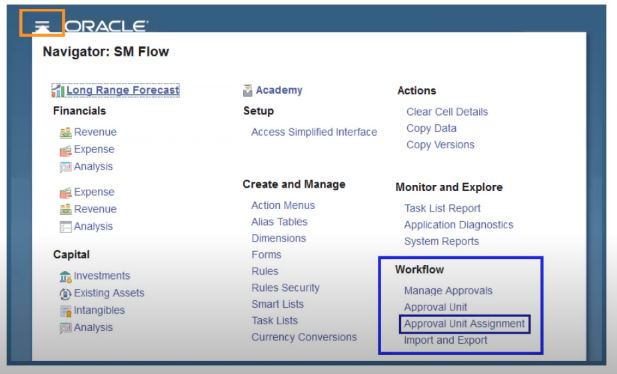
Step 7: Select the Approval unit assignment from the workflow. Approval units can be assigned to the scenario and version here.
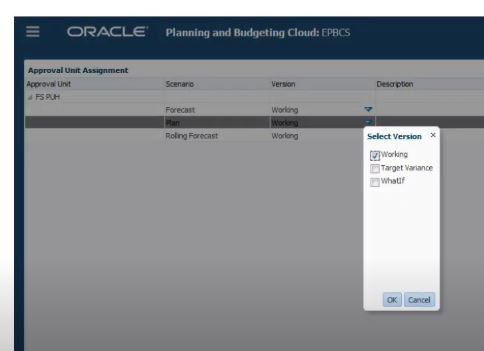
Step 8: Select the required scenario and version, and click the save button.
Step 9: Only the admin user can initiate the approval unit. Select manage approvals from workflow to initiate approval units.
Step 10: Now log in as the approval unit owner. Open tasks, enter data in the Forms, mark tasks as templates, and click save > next.
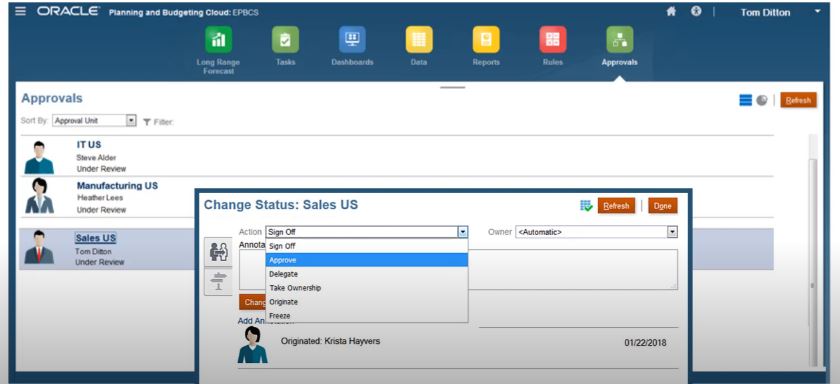
Step 11: Select promote from the dropdown list > approval unit, and provide annotation. Select the next owner from the dropdown list. Click change status and done.
Setting up Email for Approval Notifications
Owners and reviewers must enable approval notifications if they want to get an email notification when there’s a change in approvals status or approvals ownership. Approval notifications are enabled on the Application Settings page.
Approval notification emails contain the following information:
- URL to Check Status
- Application Name
- Approval unit
- Current Owner
- Previous Owner
- Last Action
- Current Status
- Time
- Annotation Title
- Annotation Text
To enable approvals notifications:
- Click on ‘Application’ > ‘Settings’ on the home page.
- Select Approvals under Notifications.
- Enter your email address.
Have you used Approval workflows in Oracle Cloud EPM?
Give it a try if you haven’t. You will love its power and simplicity.
Connect with Tangenz IT System Integrators, an Oracle Preferred Partner, if you need help with Approval workflows or Oracle Cloud EPM implementation.


