GOAL
This article helps you connect Oracle autonomous databases from the ODI studio using wallet files.
Overview of Autonomous Database Connections
Oracle’s autonomous database offers 3 types of connection –
- Oracle NetSuite Service Name – JDBC thin driver, JDBC OCI, Oracle Call Interface (OCI) & ODBC drivers can use Oracle Net Service names to connect autonomous databases.
- Oracle wallet file – Java & JDBC thin driver uses wallet files (ewallet.p12 & cwallet.sso) files to connect autonomous databases.
- Oracle JKS files – Java & JDBC thin driver uses JKS files (truststore.jks & keystore.jks) files to connect autonomous databases.
Here we will use Oracle wallet files to connect to the database.
Prerequisites for Autonomous Database Connections
Make sure you meet the following requirements.
- An autonomous database with security rules configured allows connections from the ODI Studio client network.
- An ODI studio J2EE/stand-alone agent with a minimum 12c version.
Creating a Connection
Download the wallet file from ADW
Download the wallet file from the Autonomous database console.
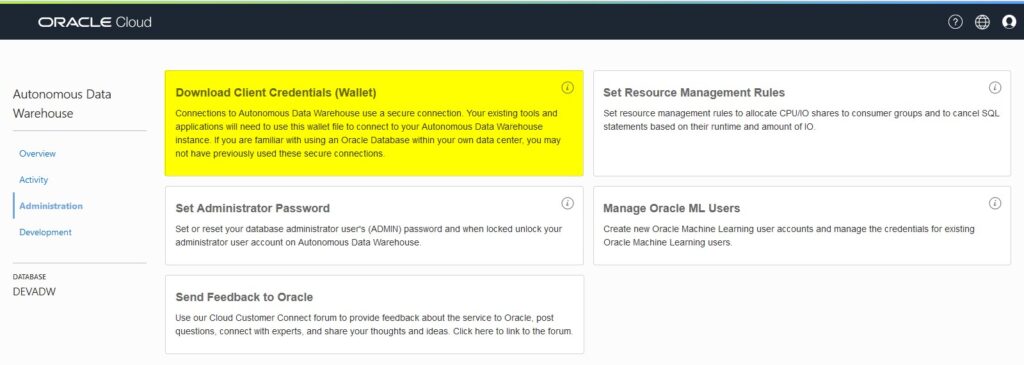
From OCI console Autonomous database page > Navigate to Service Console.
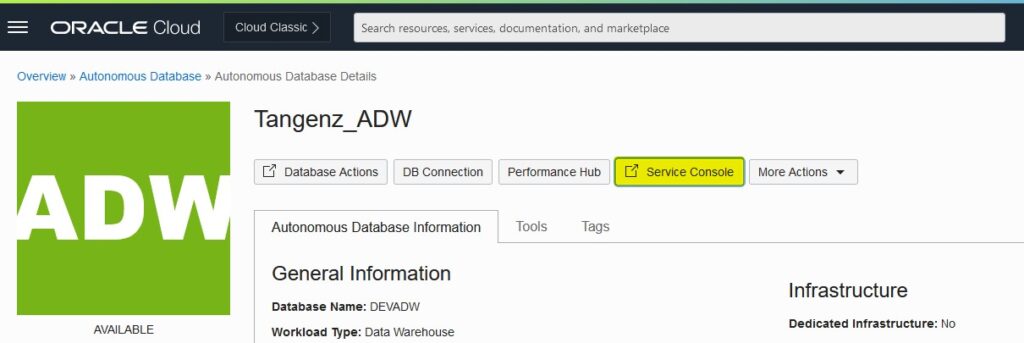
On the ADW service console page go to > Administration, and click on “Download Client Credentials (Wallet)”.
Next, you need to enter a password to download the wallet. This password is also used as a wallet & trust store password.
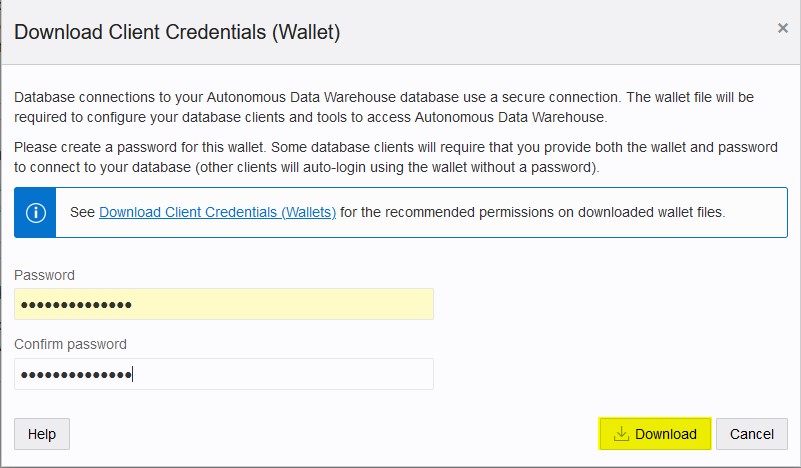
Now you will see a wallet downloaded “Wallet_<DBname>.zip.”
Connect to ADW from the ODI studio
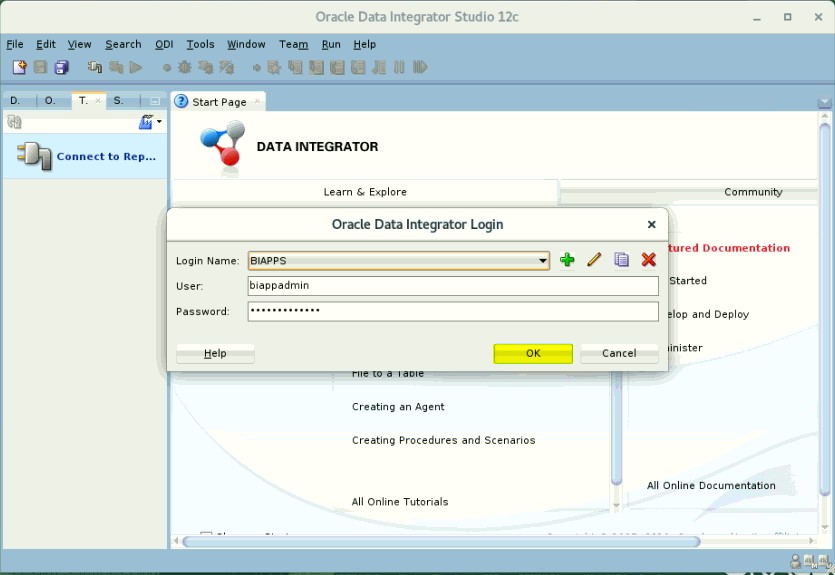
Copy the downloaded wallet file to the ODI client machine.
Open ODI Studio and connect to the repository.
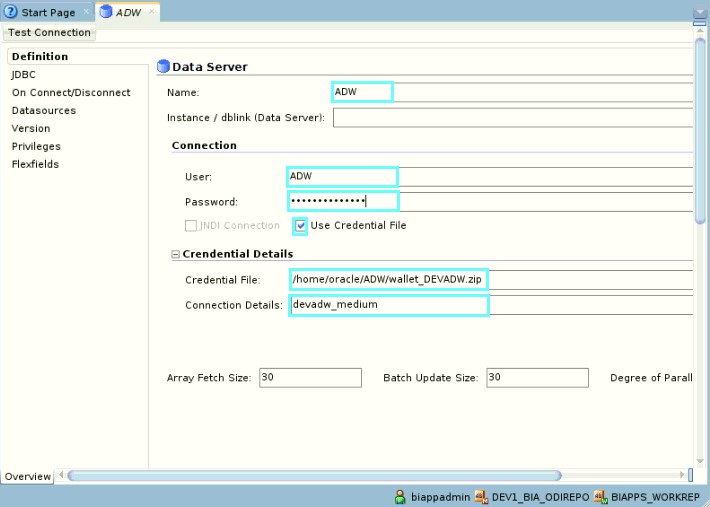
Navigate to Topology > Physical Architecture > Technologies > Right-click on Oracle > Click “New Data Server”

On the New Data Server page, fill in the following details.
Name – <Data Server Name>
User – <ADW username>
Password – <Password to connect ADW username>
Credential File – <Wallet file location on the machine>
Connection Details – <TNS_connection_type>
Next, go to JDBC from the left side pane. You should see the JDBC URL is auto-populated.
Then you need to manually change the “oracle.net_wallet_location” property values to the correct location.
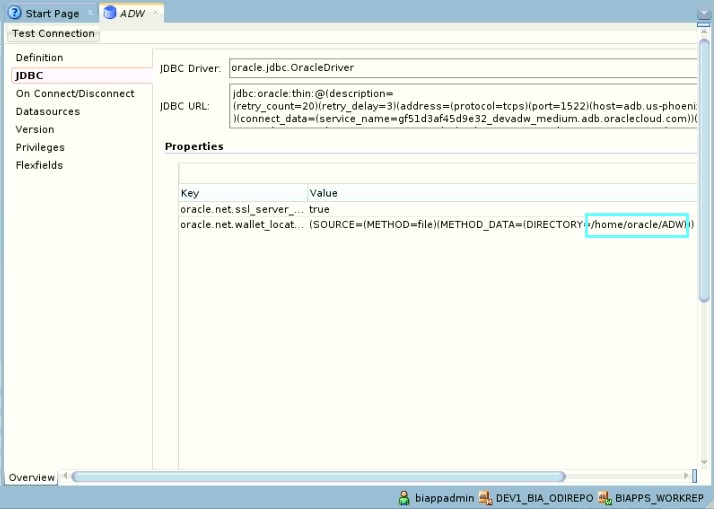
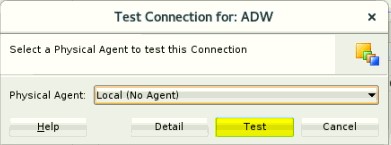
Now click on Save and Test Connection.
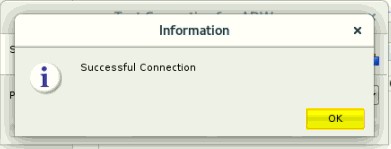
Now you will see the connection is successful.
In conclusion, connecting to an autonomous database requires certain prerequisites, such as an Oracle Cloud Infrastructure and an ODI Studio J2EE/stand-alone agent with a minimum 12c version. Oracle wallet files are used for the connection and can be downloaded from the Autonomous Database console.
For more reliable Oracle Cloud Infrastructure solutions, try Tangenz, an Oracle preferred partner. Tangenz can help you with the connection of autonomous databases to Oracle cloud wallet files and more.
Visit https://tangenz.com/ to learn more!